
How to upgrade Red Hat Linux 6.9 to 7.4
Red Hat is a one of Linux distribution among many others such as Ubuntu, CentOS, Fedora, and others. Many servers around the world use Red Hat to run their server.
I have recently had to do an upgrade to one of our clients from Red Hat Linux 6.8 to 7.4 and I would like to show you how I have set up a lap to test the tools to upgrade. I recommend you to duplicate the environment of production server for lab testing.
Please note the following below
· This guide aims to show you the tools Red Hat has given us to upgrade from version 6 to version 7
· The environment is only on VM which is not reflect the actual environment of our client, therefore, there could be some different outcome when trying to upgrade on production server!!!
· I assume you can install Red Hat on your VM which could be Virtual Box, VMware or any other VM application you familiar with. (Mine is Virtual Box).
Precaution: Please backup your system before running the upgrade to in case anything happens and you might need to fresh install Red Hat 7.4 or roll back to Red Hat 6.9
1. First thing first, check your current Red Hat version. Mine was Red Hat 6.9
![]()
2. You should be sure to update your Red Hat 6 to the latest version before attempt the preupgrade tools. So, do ‘yum update’ to update to latest Red Hat 6.
If the error shows as below. These require an internet connection to connect to Red Hat server.
Be sure to register your subscription carefully again. I have found that for the system that runs for a long time like my client. I have to unregister and register again for ‘yum update’ to properly run.
Refer to thread on https://access.redhat.com/discussions/3066851?tour=8

3. For some system, the error might show something like ‘It is registered but cannot get update’ The methods are the same try to run these command in sequence. Sometimes you don’t have to unregister, only refresh and attach –auto might do the trick.
sudo subscription-manager remove --all

sudo subscription-manager unregister

sudo subscription-manager clean
Now you can re-register the system, attach the subscriptions
sudo subscription-manager register

sudo subscription-manager refresh

sudo subscription-manager attach --auto
Note that when you unregister, your server is not down, this is only an unregister Red Hat subscription meaning you cannot get any update from them but your server can still be running.
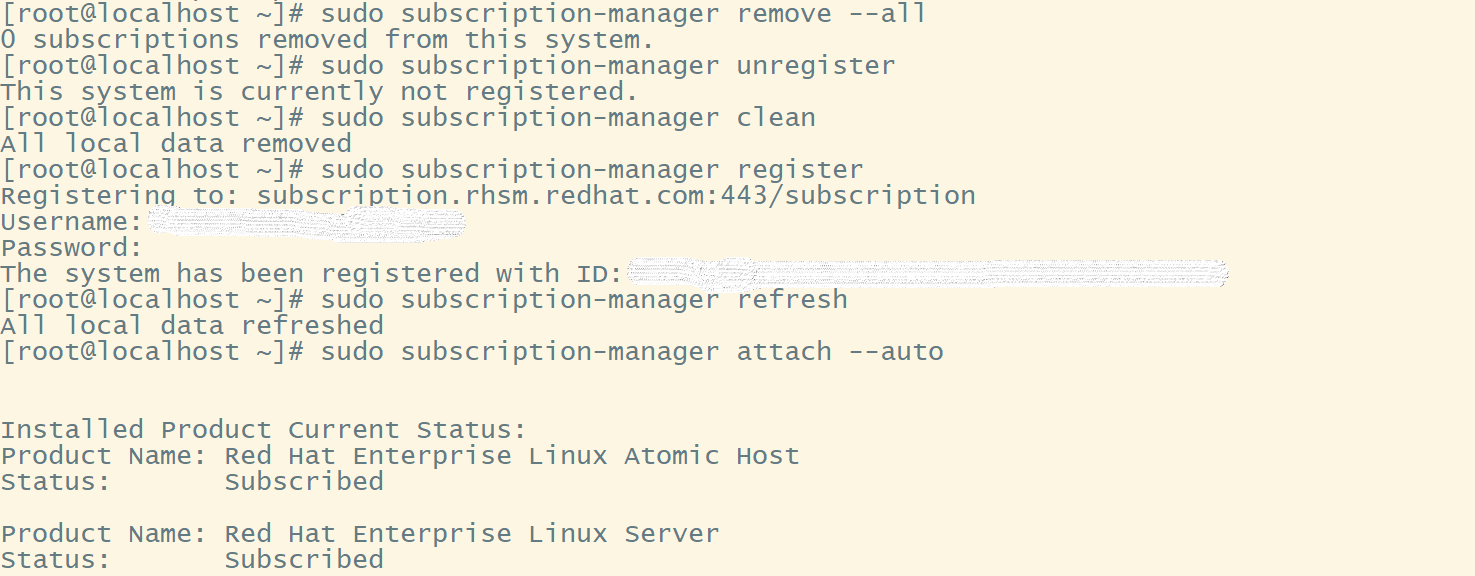
After that, you should now be able to do ‘yum update’ then download the update. At the end, you should see the screen below which mean you can now proceed to upgrade procedure.

4. Then enable your subscription to the repository of Preupgrade Assistant.
![]()
Then install the Preupgrade Tools
![]()
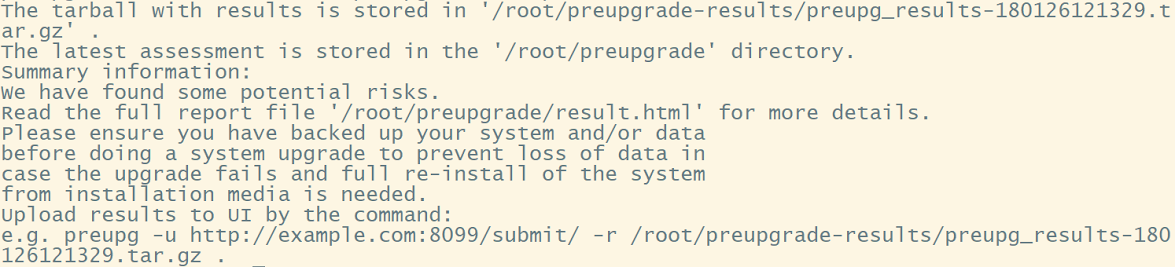
5. Once you have installed everything, run the pre upgrade tool, it should take awhile. This tool will examine every package in the system and determine if there could be any error you need to fix before an upgrade. In my experience, I found solutions to most errors by googling the Internet, but it may not always work for your environment.
![]()
After preupg is finished running, please check the file in ‘/root/preupgrade/result.html’ which can view in any browser. You could transfer the file the computer that has browser.
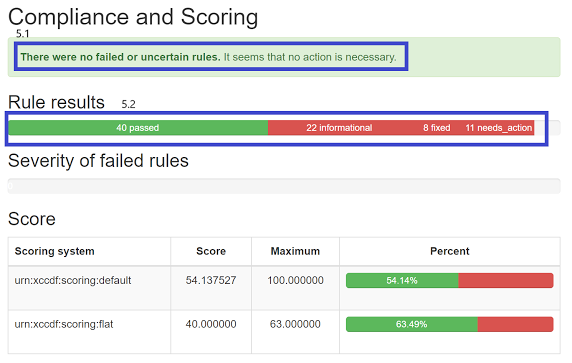
The file result.html will show all necessary information about your system before an upgrade. Basically, if you see information like 5.1 on the screen, you good to go.
See 5.2 for all the result after running the Preupgrade tool, be sure to check them all. I found that some information is just informational but please check the ‘needs_action’ section carefully.
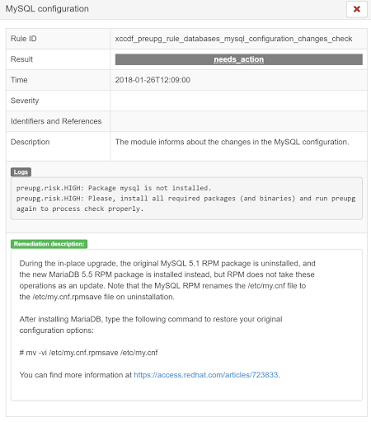
Go down and you will see specific information about result. Check Remediation description for any ‘needs_action’ to perform the suggested instruction.
6. So, you have checked everything from the Preupgrade tool. Now it’s time to start an upgrade.
6.1 Install the upgrade tool
[root@localhost ~]# yum -y install redhat-upgrade-tool
6.2 Disable all active repository
[root@localhost ~]# yum -y install yum-utils

[root@localhost ~]# yum-config-manager --disable \*
Now start an upgrade. I recommend you to save iso file of Red Hat 7.4 to the server then issue the command like below. It’s easier. Although, you could use other option like
--device [DEV]
Device or mount point of mounted install media. If DEV is omitted,
redhat-upgrade-tool will scan all currently-mounted removable devices
(for example USB disks and optical media).
--network RELEASEVER
Online repos. RELEASEVER will be used to replace $releasever variable
if it occurs in some repo URL.
[root@localhost /]# cd /root/

[root@localhost ~]# ls
anaconda-ks.cfg  install.log.syslog  preupgrade          rhel-server-7.4-x86_64-dvd.iso

install.log      playground          preupgrade-results

[root@localhost ~]# redhat-upgrade-tool --iso rhel-server-7.4-x86_64-dvd.iso
Then reboot
[root@localhost ~]# reboot
7. Upgrade is now completed. Check your version after upgrade!!!! Then don’t forget to check other software and functionality that it runs correctly
[root@localhost ~]# cat /etc/redhat-release

Red Hat Enterprise Linux Server release 7.4 (Maipo)

---------------------------------------------------------------------------------------------------------------------------
I hope the information could guide you through how to upgrade Red Hat Linux 6.9 to 7.4 more or less. I’m also new to Red Hat myself and still have a lot to learn.
Please let me know your experience of upgrade your own Red Hat or if you have any questions, I would try my best to help. Thanks for reading!